Pain is one of the most common concerns for anyone considering a tattoo. The truth is, tattoo pain varies dramatically depending on where you get inked — and understanding this helps you make informed decisions about placement.
This comprehensive tattoo pain chart breaks down every major body area, explains why certain spots hurt more than others, and provides practical tips for managing discomfort during your session.
Why Tattoo Pain Varies by Location
Not all skin is created equal. The pain you experience during tattooing depends on several anatomical factors:
Nerve density — Areas with more nerve endings (like hands, feet, and genitals) are significantly more painful. These nerve-rich zones send more pain signals to your brain during the tattooing process.
Proximity to bone — When the tattoo needle vibrates against bone with minimal cushioning, you feel it more intensely. Think ribs, spine, elbows, and ankles.
Skin thickness — Thicker skin acts as a buffer. Areas like the outer arm have thicker, more resilient skin, while inner arms and sides of the torso have thinner, more sensitive skin.
Fat and muscle padding — Fatty areas like the outer thigh naturally cushion the needle's impact. Bony areas with little padding offer no such protection.
The Complete Tattoo Pain Chart
We've ranked 25+ body placements from least to most painful based on anatomical factors, tattoo artist experience, and client feedback.
Pain Level Scale
| Level | Description | What It Feels Like |
|---|---|---|
| 1-2 | Low | Mild scratching, easily tolerable |
| 3-4 | Low-Moderate | Consistent scratching, manageable discomfort |
| 5-6 | Moderate | Noticeable pain, may need short breaks |
| 7-8 | High | Significant discomfort, requires mental focus |
| 9-10 | Severe | Intense pain, challenging to sit through |
Least Painful Tattoo Placements (1-4/10)
These areas are ideal for first tattoos or anyone with lower pain tolerance.
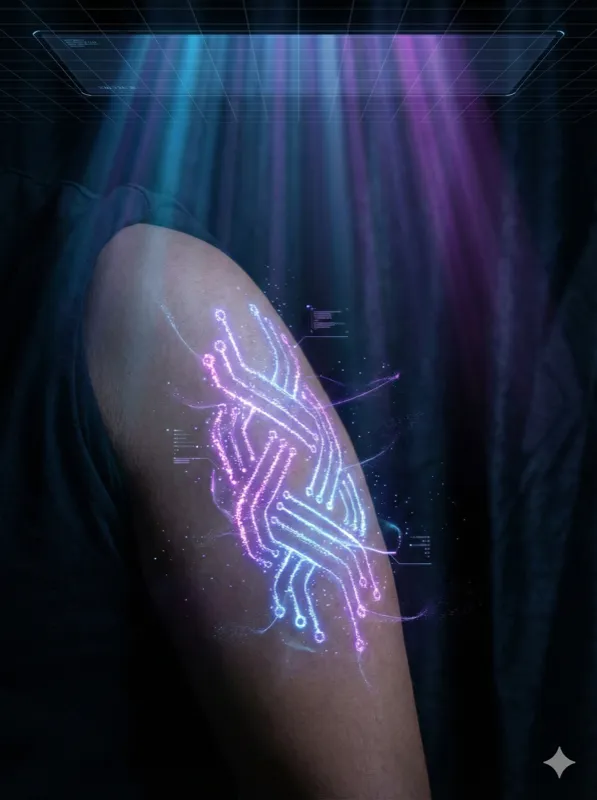
Outer Upper Arm / Bicep — Pain Level: 2-3/10
The outer upper arm is one of the most comfortable spots for tattooing. Thick skin, decent muscle padding, and relatively few nerve endings make this an excellent choice for beginners.
Why it's easy:
- Good muscle and fat cushioning
- Thick, resilient skin
- Limited nerve concentration
- Easy for the artist to work on
Best for: Medium to large designs, first tattoos, sleeves, portraits
Outer Thigh — Pain Level: 2-3/10
Your outer thigh offers an excellent canvas with minimal pain. The area has substantial padding from both fat and muscle, making longer sessions more manageable.
Why it's easy:
- Maximum fat and muscle padding
- Large flat surface for detailed work
- Few nerve endings compared to inner thigh
- Can be hidden easily under clothing
Best for: Large pieces, detailed designs, leg sleeves
Calf — Pain Level: 3-4/10
The calf muscle provides good cushioning, making it a popular choice for first-timers who want something larger than a small symbol.
Why it's relatively easy:
- Strong muscle padding
- Moderate skin thickness
- Good surface area for detailed work
Watch out for: The inner calf and area near the ankle bone become significantly more painful.
Best for: Medium to large designs, nature scenes, portraits
Upper Back / Shoulder Blade — Pain Level: 3-4/10
Away from the spine, the upper back offers substantial muscle padding. This area can accommodate large pieces with moderate discomfort.
Why it's manageable:
- Thick skin
- Good muscle coverage
- Large canvas for ambitious designs
Watch out for: Pain increases dramatically as you approach the spine.
Best for: Back pieces, wings, large geometric designs
Forearm (Outer) — Pain Level: 3-4/10
The outer forearm is one of the most popular tattoo locations, combining visibility with manageable pain levels.
Why it works:
- Decent muscle padding
- Moderate skin thickness
- Highly visible for showing off
Watch out for: The inner forearm is more sensitive; near the wrist and elbow increases pain.
Best for: Script, traditional designs, sleeves, memorial pieces
Moderately Painful Placements (5-6/10)
These areas require more mental preparation but are manageable for most people.
Inner Forearm — Pain Level: 5/10
More sensitive than the outer forearm due to thinner skin and more nerve endings, but still very doable for most.
Why it's moderate:
- Thinner skin than outer arm
- More nerve endings than outer forearm
- Still has some muscle padding
Best for: Script tattoos, fine line work, meaningful quotes
Chest (Away from Sternum) — Pain Level: 5-6/10
The outer chest near the pectoral muscles has decent padding. Pain increases as you move toward the center.
Why it varies:
- Muscle padding varies by individual
- More painful near collarbone and sternum
- Skin stretches during breathing
Best for: Large traditional pieces, portraits, meaningful symbols
Inner Bicep — Pain Level: 5-6/10
The soft, sensitive inner arm hurts more than the outer bicep but remains manageable.
Why it's more sensitive:
- Thinner skin
- More nerve endings
- Less muscle coverage than outer arm
Best for: Designs meant to be hidden, personal pieces
Outer Ankle — Pain Level: 5-6/10
While visible and popular, the ankle has thin skin stretched over bone.
Why it's moderate:
- Limited fat padding
- Close to ankle bone
- Thin skin
Watch out for: Pain increases near the bone; inner ankle is more sensitive.
Best for: Small to medium designs, delicate florals, symbols
Hip / Upper Outer Hip — Pain Level: 5-6/10
The hip area varies significantly — outer hip with muscle padding is moderate, while the hip bone itself is much more painful.
Why it varies:
- Padding varies by individual
- Hip bone proximity increases pain
- Skin can be sensitive
Best for: Medium designs, florals, script
High Pain Placements (7-8/10)
These locations require preparation, pain management strategies, and possibly multiple shorter sessions.
Ribs / Side of Torso — Pain Level: 7-8/10
Ribs are notorious for pain. Thin skin directly over bone, plus the sensation of the needle vibrating against ribs, makes this challenging.
Why it's painful:
- Minimal fat or muscle padding
- Direct contact with rib bones
- Skin stretches with breathing
- Many nerve endings
Pain management tips:
- Take slow, steady breaths
- Don't hold your breath
- Consider shorter sessions
- Topical numbing cream may help
Best for: Meaningful pieces worth the pain, side panels, flowing designs
Elbow / Elbow Ditch — Pain Level: 7-8/10
The elbow joint and surrounding area (especially the inner elbow "ditch") combine thin skin, bone proximity, and high nerve density.
Why it's painful:
- Bone directly under thin skin
- Lots of nerve endings
- Skin moves with joint
- Inner elbow is especially sensitive
Best for: Completing sleeves, connecting arm work
Knee / Behind Knee — Pain Level: 7-8/10
Similar to the elbow, the knee joint presents multiple pain factors. Behind the knee is particularly sensitive.
Why it's painful:
- Thin skin over bone
- Nerve-rich area (especially behind)
- Skin moves with joint
Best for: Leg sleeves, connecting thigh and calf work
Neck (Front and Sides) — Pain Level: 7-8/10
The neck has thin skin, limited padding, and many nerve endings — plus the psychological factor of being so close to the face and throat.
Why it's painful:
- Very thin skin
- High nerve density
- Limited padding
- Psychological discomfort
Best for: Bold statements, visible pieces, script
Sternum / Center Chest — Pain Level: 7-8/10
The breastbone sits directly under thin skin with no cushioning. Every pass of the needle resonates through the bone.
Why it's painful:
- Bone directly under skin
- No muscle or fat padding
- Skin stretches with breathing
- Central nerve pathway
Best for: Ornamental designs, between-breast pieces, symbolic work
Most Painful Placements (9-10/10)
These areas test even experienced tattoo collectors. Consider your commitment carefully.
Spine / Vertebrae — Pain Level: 9/10
Tattooing directly over the spine means the needle vibrates through every vertebra. The spinal column is packed with nerves.
Why it's extreme:
- Bone directly under thin skin
- Major nerve pathways
- Vibration resonates through spine
- Long sessions are challenging
Pain management is essential: Consider breaking into multiple sessions, use numbing cream, and focus on breathing techniques.
Best for: Truly meaningful pieces, designs that use the spine as a central element
Hands / Fingers — Pain Level: 9/10
Hands have thin skin stretched over bones, tendons, and one of the highest concentrations of nerve endings in the body.
Why it's extreme:
- Extremely high nerve density
- No padding whatsoever
- Thin skin over bone and tendon
- Fingers are especially intense
Additional considerations: Hand tattoos fade faster and may need touch-ups. Not all artists do hand tattoos.
Best for: Meaningful symbols, wedding ring alternatives, bold statements
Feet / Toes — Pain Level: 9/10
Like hands, feet have thin skin, minimal padding, and dense nerve endings designed to feel every surface you walk on.
Why it's extreme:
- High nerve concentration
- Thin skin over bones
- Toes are especially painful
- Top and sides vary in intensity
Additional considerations: Healing is challenging due to sock/shoe friction. Touch-ups may be needed.
Best for: Small meaningful pieces, symbols, delicate designs
Armpit — Pain Level: 9-10/10
One of the most universally painful spots. Thin skin, major nerve clusters, and glands make this area exceptionally sensitive.
Why it's extreme:
- Major nerve concentration
- Very thin skin
- Glandular tissue
- Awkward positioning
Best for: Extending sleeve coverage, brave collectors only
Head / Face / Scalp — Pain Level: 9-10/10
Facial tattoos involve thin skin over bone with extensive nerve networks. The scalp adds vibration that resonates through the skull.
Why it's extreme:
- Minimal padding
- High nerve density
- Psychological intensity
- Bone vibration (scalp)
Additional considerations: Significant social implications; cannot be easily covered.
Best for: Carefully considered permanent choices
Groin / Inner Thigh — Pain Level: 9-10/10
The inner thigh near the groin combines thin skin, major nerve pathways, and psychological sensitivity.
Why it's extreme:
- High nerve concentration
- Thin, sensitive skin
- Intimate area sensitivity
- Limited artist experience with area
Best for: Hidden personal pieces
Tattoo Pain: Men vs. Women
Research and anecdotal evidence suggest some differences in tattoo pain experience between sexes, though individual variation matters more than gender.
| Factor | Men | Women |
|---|---|---|
| Pain threshold | Slightly higher on average | Slightly lower on average |
| Pain tolerance | Similar | Similar (may even be higher) |
| Hormonal effects | Minimal variation | Menstrual cycle can affect sensitivity |
| Body composition | Less fat padding on average | More fat padding in some areas |
| Psychological prep | Often underestimate | Often better prepared |
Key takeaway: Individual pain tolerance varies far more than gender-based differences. Don't let gender-based assumptions affect your tattoo decisions.
Pain Management Strategies
Before Your Session
- Get good sleep — Fatigue lowers pain tolerance
- Eat a substantial meal — Low blood sugar worsens discomfort
- Stay hydrated — Hydrated skin tattoos better
- Avoid alcohol — Thins blood and increases sensitivity
- Avoid painkillers — Most thin blood; consult your artist
During Your Session
- Breathe steadily — Deep, rhythmic breathing helps manage pain
- Don't tense up — Relaxed muscles hurt less
- Bring distractions — Music, podcasts, conversation
- Take breaks — Ask for pauses when needed
- Use numbing cream — Discuss options with your artist beforehand
- Communicate — Tell your artist when you need adjustments
Psychological Techniques
- Reframe the sensation — Focus on the outcome, not the moment
- Meditation — Mindfulness helps manage acute pain
- Visualization — Picture the finished result
- Accept the discomfort — Fighting pain makes it worse
Planning Your Tattoo Around Pain Tolerance
Use our AI Tattoo Generator to design your perfect tattoo, then consider placement based on pain tolerance:
First Tattoo? Start Here:
- Outer upper arm — Minimal pain, good canvas
- Outer thigh — Low pain, large area
- Calf — Manageable pain, easy to cover
Building Pain Tolerance:
Progress from lower-pain areas to higher-pain areas as you gain experience. Your nervous system adapts, and you'll learn your personal management strategies.
Ready for a Challenge:
If you want ribs, spine, or other high-pain areas, consider:
- Starting with smaller designs in that area
- Breaking large pieces into multiple sessions
- Discussing pain management with your artist
Preview Before You Commit
The worst pain is regretting a tattoo placement. Before any session:
- Design your concept with our AI Tattoo Generator
- Preview placement using our tattoo simulator
- Evaluate the pain level using this chart
- Make an informed decision about design, size, and placement
Pain is temporary — your tattoo is permanent. Make sure you're choosing placement for the right reasons, not just avoiding discomfort.
Frequently Asked Questions
What's the most painful place to get a tattoo?
The most universally painful areas are the armpit, spine, ribs, hands, feet, and groin. These areas combine thin skin, proximity to bone, and high nerve density for maximum discomfort.
Do tattoos hurt less the more you get?
Many people report that subsequent tattoos feel more manageable. This could be due to psychological preparation, knowing what to expect, and possibly some nervous system adaptation. However, anatomically painful areas remain painful regardless of experience.
Can I use numbing cream for my tattoo?
Yes, but discuss it with your artist first. Some artists prefer clients don't use numbing products because they can affect skin texture. Others are happy to work with properly applied numbing cream. Never apply numbing products without consulting your artist.
How long does tattoo pain last after the session?
Immediately after: slight burning sensation (2-4 hours) First few days: tenderness and sensitivity (similar to sunburn) Week 1-2: itching during healing (uncomfortable but not painful) After healing: no pain
Does size affect pain level?
Larger tattoos mean longer sessions, which can be more challenging due to cumulative discomfort and fatigue. However, the location matters more than size — a small rib tattoo may hurt more than a large thigh piece.
Should I avoid painful areas for my first tattoo?
Generally, yes. Starting with moderate-pain areas helps you understand your pain tolerance and learn management techniques before tackling more challenging placements.
Explore more: Your First Tattoo: Complete Guide | Tattoo Placement Guide | Tattoo Styles Explained